Revit Trim Wall To The Slope Of A Roof

Slope Wall Attach To Roof Autodesk Community

Slop Bottom Of Wall Autodesk Community Revit Products

Revit Tips Spanish Roof Adaptive Insane Version Revit Tutorial Autocad Revit Roof
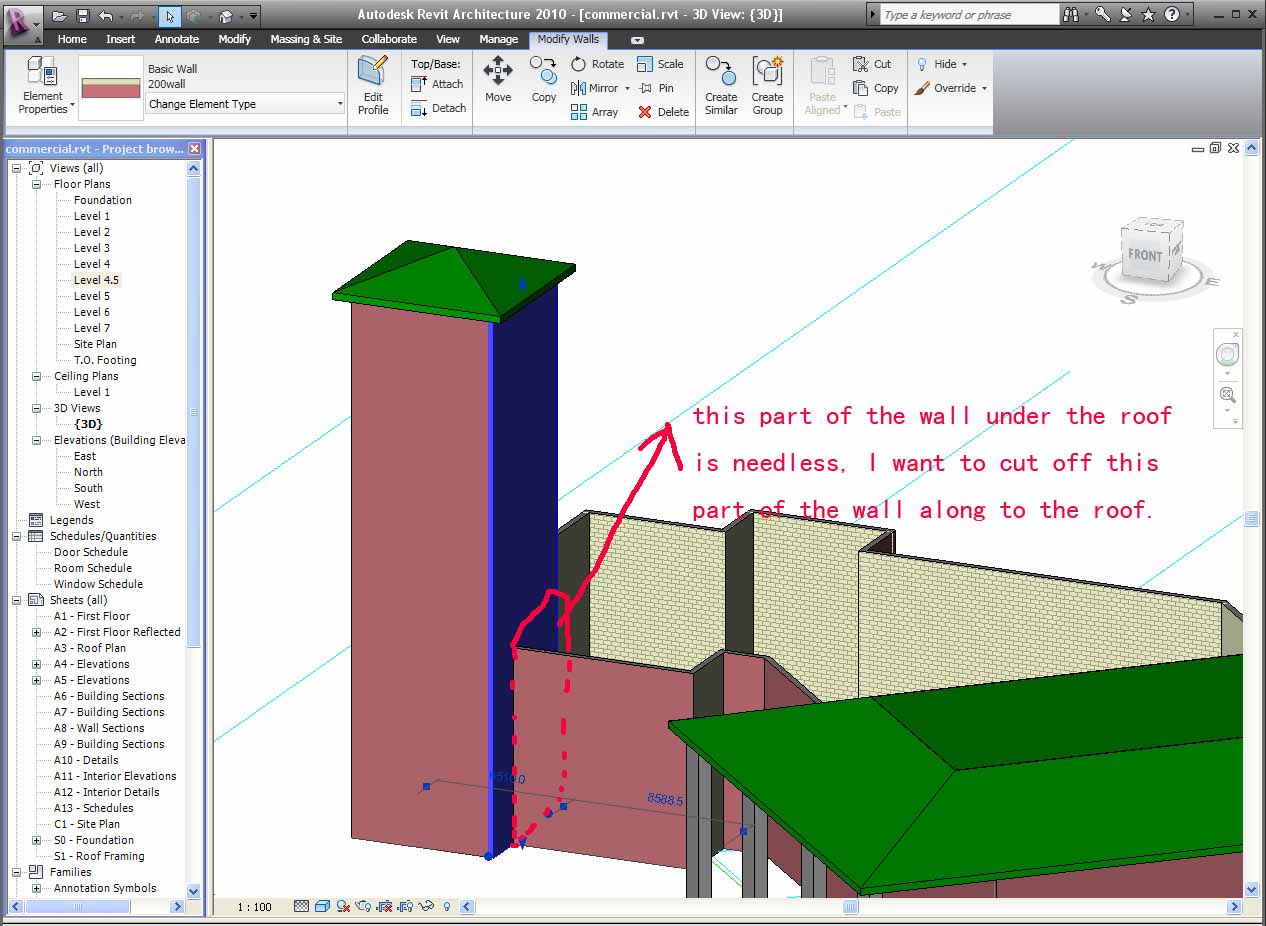
Revitcity Com How To Cut The Wall Along The Roof

Revit Roof Basics 10 Slope Arrow Cadclips Youtube

Struggling To Create The Perfect Roof This Guide Will Teach You How To Control Roof Slope How To Create A Dormer And Many More Eff Roof Repair Roofing Roof

Attach walls to the roof.
Revit trim wall to the slope of a roof.

How To Modify The Side Contour Of A Wall Architecture Program New Surface Roof Beam

Trapezoidal Wall Cladding Wall Cladding Cladding Revit Architecture

Revit Conceputal Massing 04 Wall Roof By Face Revit Tutorial Autodesk Revit Mass

Pin On Tips Tricks In Revit
Source : pinterest.com
