Revit Tapered Sloped Roof

Revitcity Com Roof Slope And Tapered Insulation

About Editing Floor And Roof Shape Revit Products 2018 Autodesk Knowledge Network

Tapered Roof Mass

Revit Tapered Roof Cricket With In Place Sweep Blend Cadclip Youtube

Revitcity Com Roof Slope And Tapered Insulation
Revit Roof Tip 8 Set Variable Material For Sloped Insulation Youtube

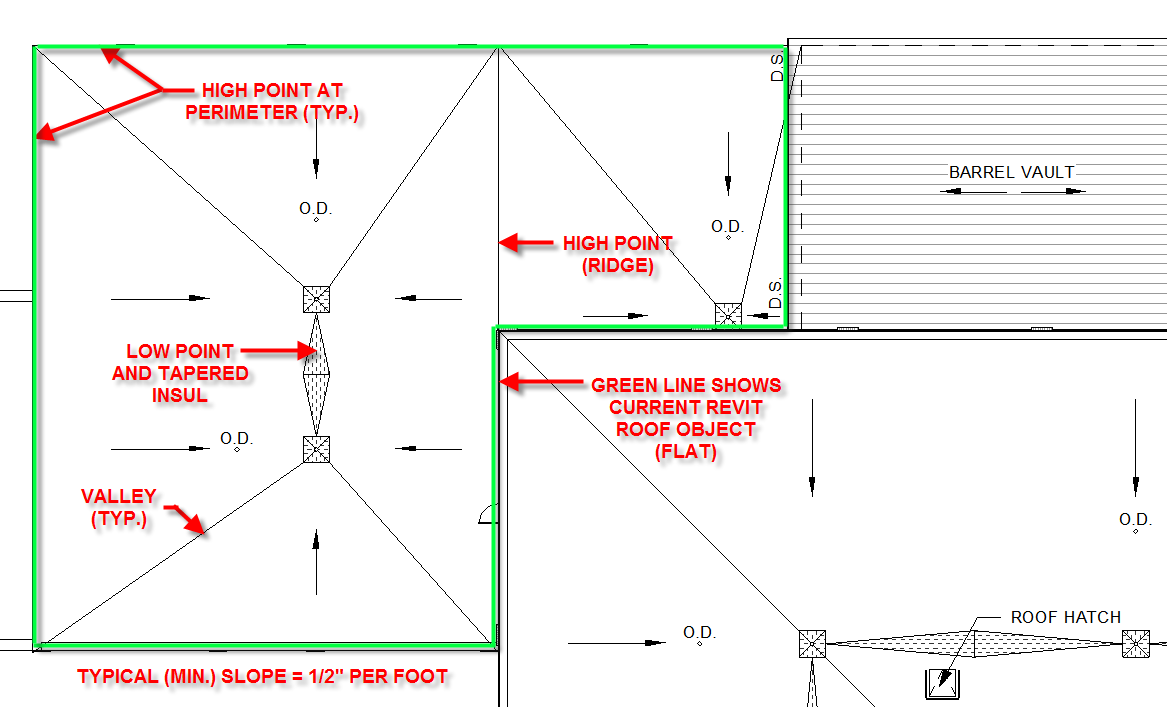
To create a hip roof 4 side slope define slope for all boundaries.
Revit tapered sloped roof.

Tapered Roof Insulation With Further Modifications Autodesk Community Revit Products
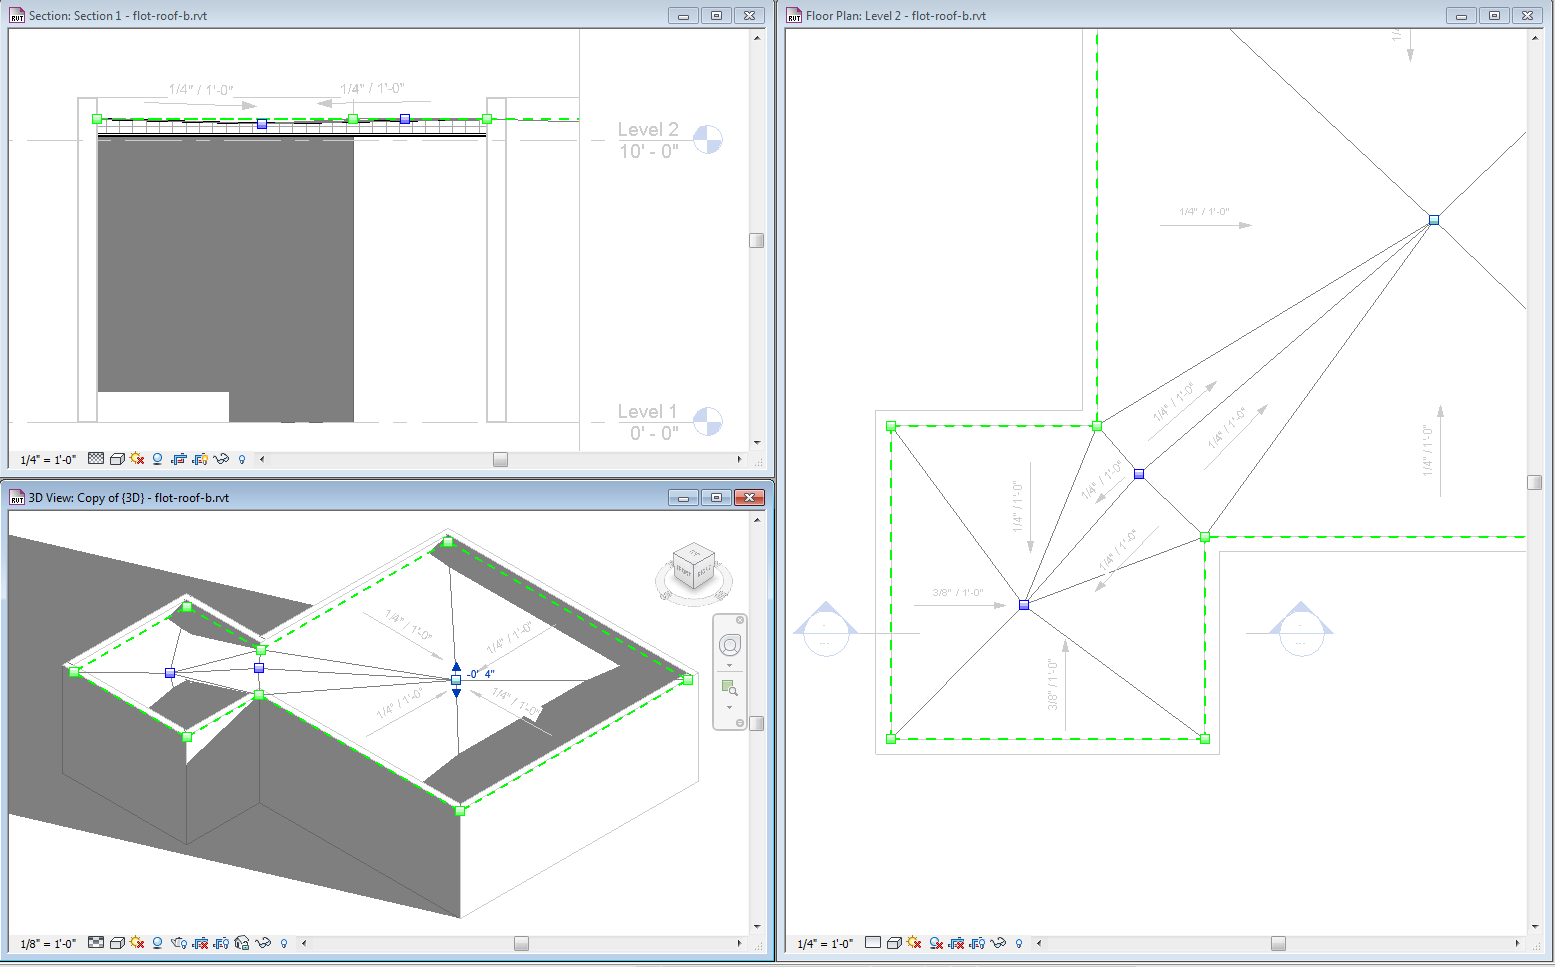
Revitcity Com Roof Slope And Tapered Insulation
Flat Roofs Matching Structural Roof Steel Slope Autodesk Community Revit Products

Solved Best Practice For Tapered Roof Or Floor Autodesk Community Revit Products
Source : pinterest.com
