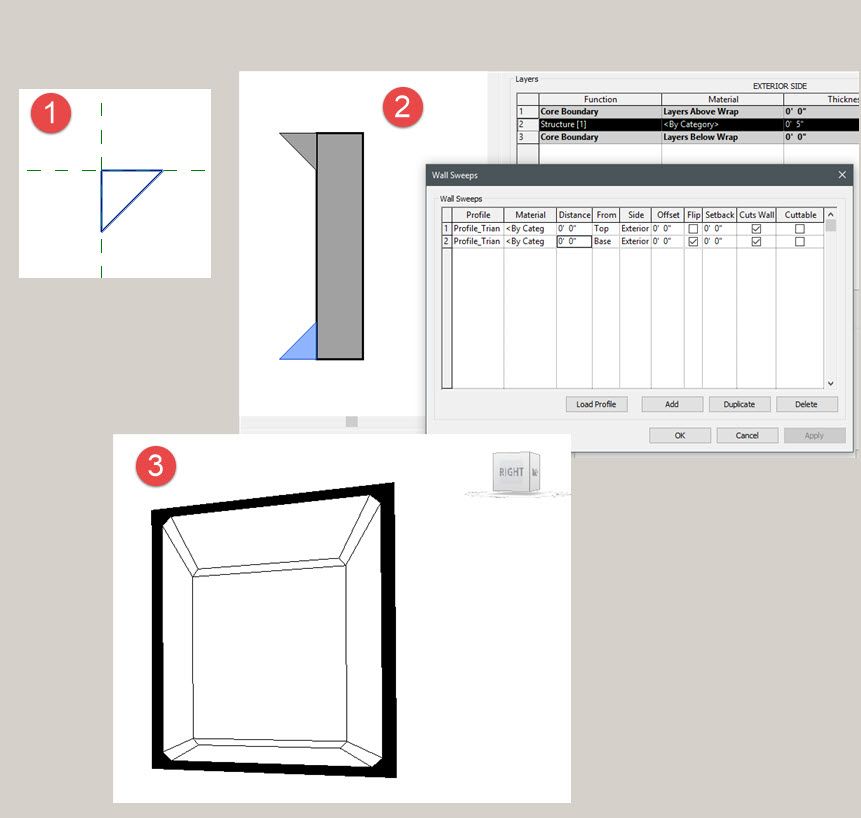
Note that you do not need to trim the sketch lines to have a valid boundary.
Revit 2018 trim extruded roof.
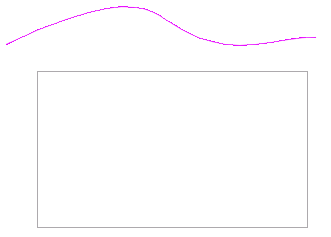
Creates a roof by extruding a profile that you sketch.
Display an elevation 3d or section view.
The highest level in the project is selected by default.
From a mass instance.
This is a general.
Click modify create extrusion tab mode panel finish edit mode.
From a building footprint.
You can create a roof.
Valid boundaries are a joined roof or its bottom face a side face of a wall a bottom face of a floor an edge of the roof to be cut or a model line on the face of the roof to be cut.
The wall must be attached to the target roof and the target roof must be a footprint roof.
This video is part of a series that walks you through the process to model a house.
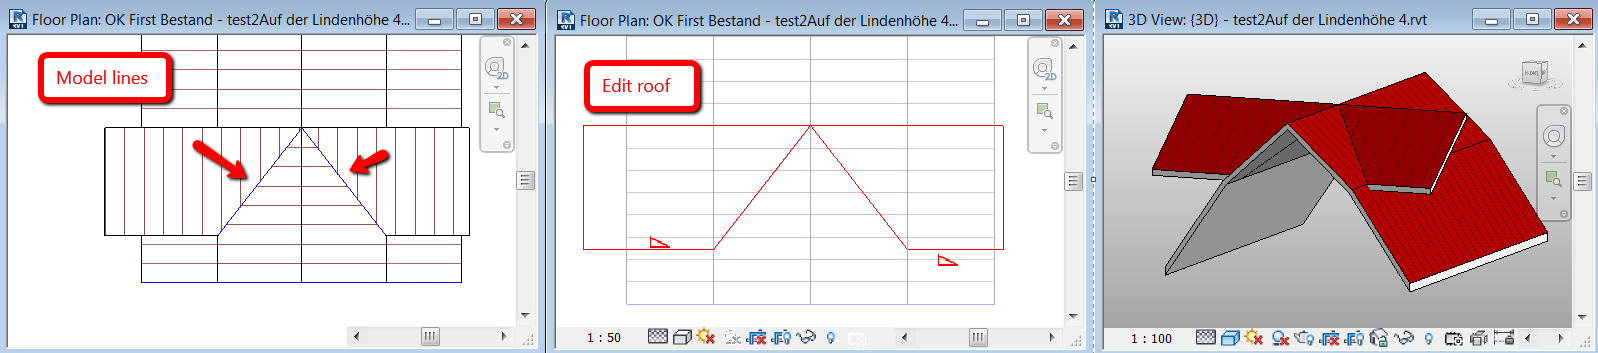
The bad thing about extruded roofs is the fact you can t follow along with the footprint of your building the good thing is we can do something about that the objective of this video is to go to the plan view we will then create a void where our walls jag in and out this is going to allow revit to cut the roof properly in plan to get started jump into your revit roofs.
For examples of basic roof shapes and a link to a sample revit model containing these examples see the roof sample file topic.
With sloped glazing.
You can join roofs to other roofs or walls or unjoin them if they were previously joined.
In this video we will go through adding a roof by extrusion to our house.
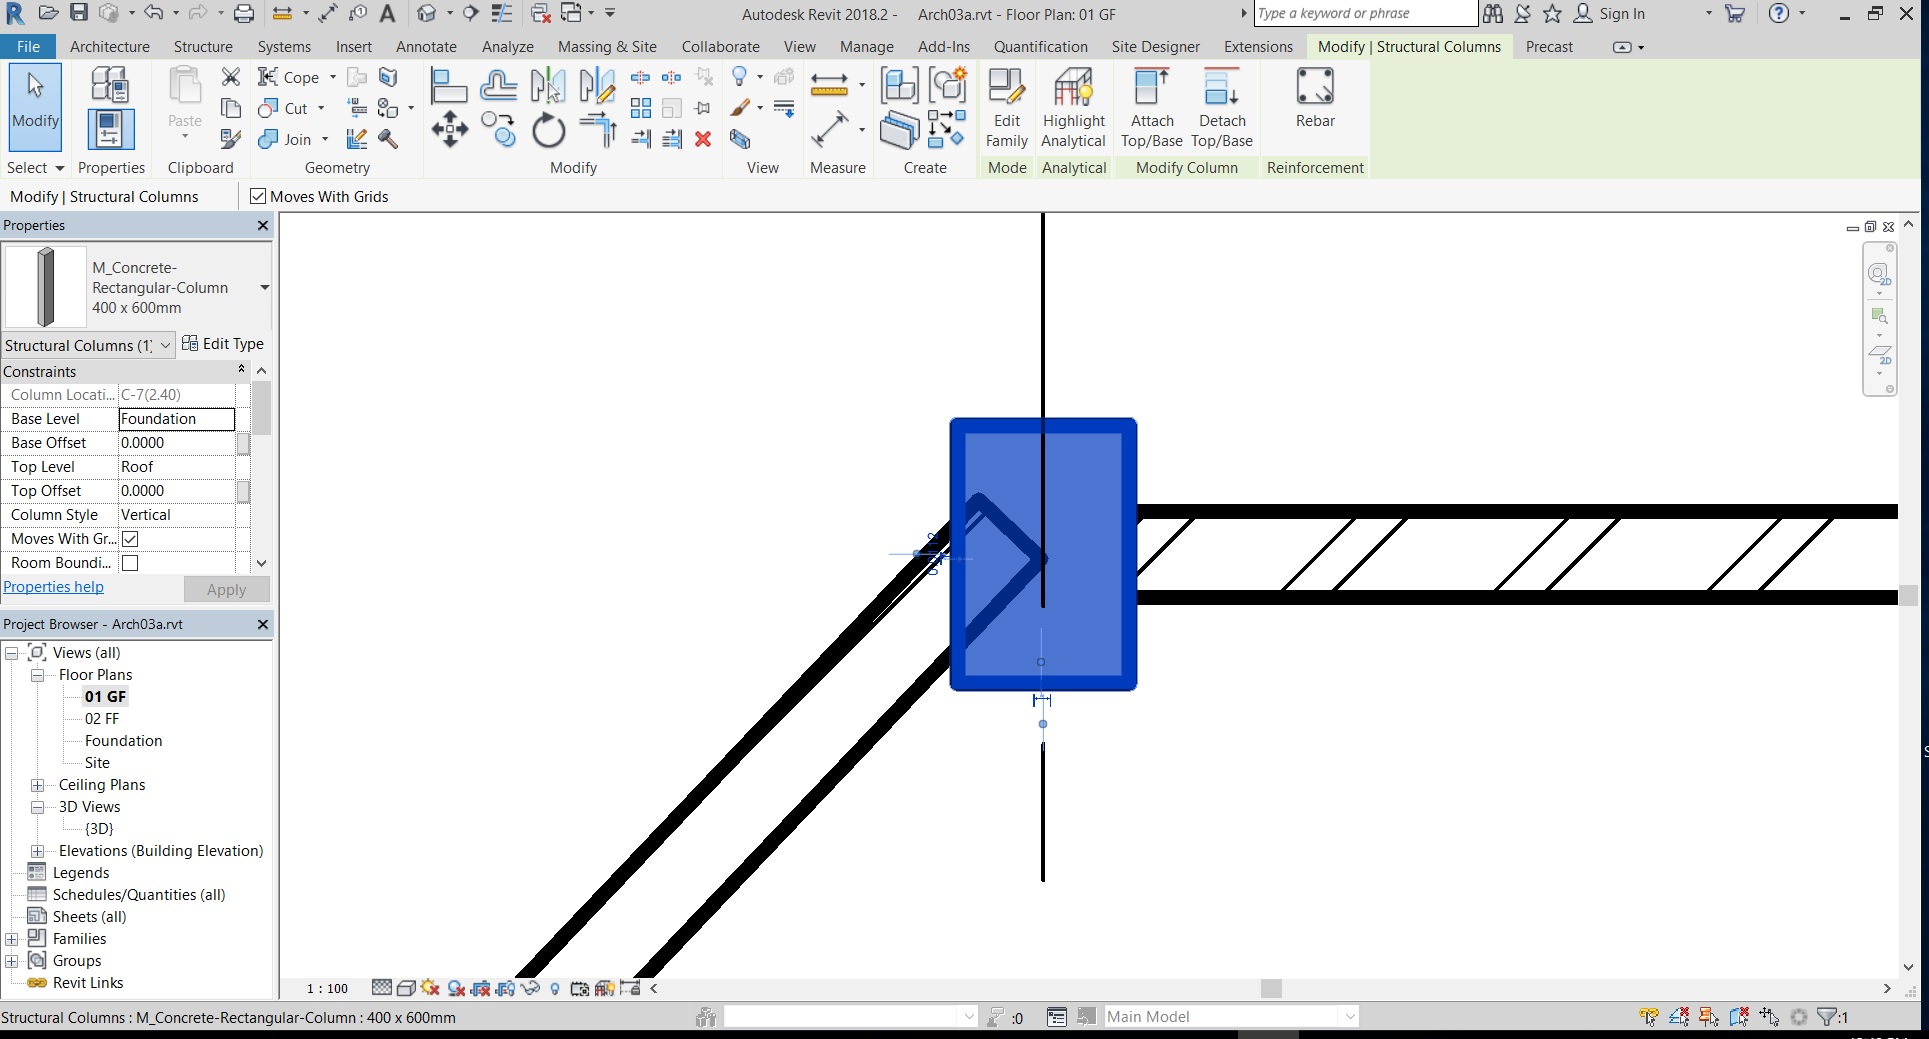
To resize the extrusion in the 3d view select it and use grips to edit it.
Choose the method that best meets the needs of your design.
To view the extrusion open a 3d view.
In the roof reference level and offset dialog select a value for level.
Specify the work plane.
Revit completes the extrusion and returns you to the view in which you started the extrusion.
In this example side faces of walls and joined faces of the roof were selected.
You can join a roof to the top face of another roof and the wall below that roof if you select the wall as the target.
You cannot join a roof to more than one top face of another roof.
Revit offers several methods of creating roofs.